Robots - Repairs Information & Tips - The most disheartening thing to see is getting a robot (your) robot and finding that it does not work or is broken. The first thing is: Oh ????. Then! what do I do? The answer is, "GET IT FIXED or FIX IT". I have worked on, and have seen what passes for repairs on a lot of robots and my answer is: If you can get someone else (a professional) to work on it, do that. Send it out for repair before you break something else that is irreplaceable. Remember leave it alone.
Warning: you proceed at your own risk! With that in mind if you have to work on the robot, here are several suggestions that is listed as rules in repairing robots;
Rule 1: If you can get someone else (a professional) to work on it, do that.
Rule 2: Don't open the robot - If you can possibly avoid it. Put in strong, fresh batteries, do not use cheap batteries. Rechargeable are ideal because they guarantee a good current. Fiddle with the switch; you'll be surprised how often a toy burst in to life when the switch is in an in-between position.
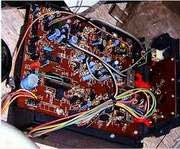
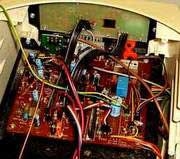
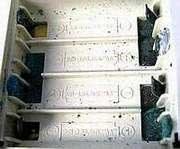
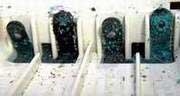
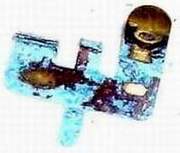
Rule 3: Make a note of how it goes together. - Look carefully at the robot. Take pictures, lots of pictures, there is never enough. Make a written note of the wiring. You have no idea how difficult it can be to work out where a loose wire belongs. The information will also come in useful at a later date. You'll find that more wires come loose as you repair a toy and you'll soon forget where they go. The connections to the battery box. These frequently break loose, or the solder joints dry up with age. Repairs are simple: a good clean up of the contacts and loose wires elsewhere with a light touch of a soldering iron. Wires might be loose, but more likely is the problem of poor a contact between the switch components. A careful cleaning of accessible contacts can solve things. Don't reassemble the toy if further repair is required.
Rule 4: Robot + Water - Disaster Above all, don't immerse a robot in water, no matter how dirty it may be and how thoroughly you may intend to dry it. Water ruins the circuit board, card insulators that hold the battery contacts and various internal switching devices. You'd be amazed at how many people dunk the whole robot in bowl of hot soapy water.
Rule 5: Take your time and work slowly replacing what parts that is needed with similar parts, don't drill holes in the plastic or metal. Remember you have time to find or make the right parts. The robot has twenty three years (23) of waiting a few weeks would not hurt.
Rule 6: For Circuit Board Repairs use Rule 1. If you have completed the above and have been successful,
Congratulations! if not go to Rule 1.
For the Tinkers and Hobbyist:
Now that I have given you some rules that is necessary when repairing your robot I will take you to the real world.
The complete robots that has been in the family for years and in pristine condition is rare, and will cost you a great deal of money. Even then remember it is old and will have problems.
For most of the robots when you buy, trade, get one, nine out of ten times it will be dirty, corroded and missing parts. I will focus on, and I am referring to, the larger robots including the plastic robots that need attention.
You will need several things to repair and rebuild your robot: A Multimeter, Digital Camera, Computer, Information, Tools, patience and the ability and dexterity (manual skills) to fix things electronically and mechanically and the time to find parts.
Or if you are extremely good, a small knife, screwdriver, pliers, file, chisel, small hammer, sandpaper, pencil and paper. Myself, I need all of the above, for I also use the camera and computer for other things. Remember there are no parts readily available for old robots.
Step 1. The first thing you must do if you can is to temporary get it working. Once you do that then you can start.
Step 2. Disassemble the robot completely, recording every step, and put the electronics in a separate place.
Step 3. Clean all of the parts with the proper cleaners. (Remember plastic and metals need different cleaners.)
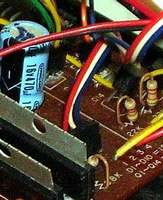
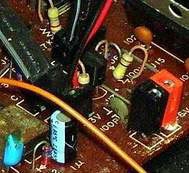
Step 4. Clean the electronics and circuit boards. ( There are many processes in cleaning electronics and you should look up the procedures and cleaners.)
Step 5. Reassemble the robot reversing the recorded steps.
Step 6. At this stage you are ready to troubleshoot the robot to get it working.
Step 7. Listed above are several procedures for disassembly and assembly.

